Why Nail Trimming is Important
Keeping your puppy's nails at an appropriate length is an important health issue for our dogs. When nails grow too long, they can cause several problems:
- Pain and discomfort: Overgrown nails can push back into the nail bed, causing pain with each step
- Altered gait: Long nails can force your puppy to adjust how they walk, potentially leading to joint issues
- Risk of breakage: Excessively long nails are more likely to snag and tear, which can be painful and lead to infection
- Difficulty walking: Especially on smooth surfaces where long nails can affect traction
- Damage to your home: Scratched floors, torn furniture, and ripped clothing can result from overgrown nails
Regular nail maintenance helps prevent these issues while also getting your puppy comfortable with handling—a valuable skill for veterinary visits and other grooming procedures.
The next time you have a wellness visit, ask about nail trimming. In an earlier blog post we discuss the importance of wellness visits.
How Often Should You Trim?
The frequency of nail trimming depends on several factors, including your puppy's breed, activity level, and the surfaces they typically walk on.
General Guidelines:
- Small breed puppies: Usually need trimming every 2-3 weeks
- Medium to large breed puppies: May need trimming every 3-4 weeks
- Very active puppies: May naturally wear down nails somewhat on rough surfaces
- Indoor puppies: Typically need more frequent trimming as they don't wear nails down naturally
A good rule of thumb: If you can hear your puppy's nails clicking on hard floors, it's time for a trim.
Nail Anatomy: What You Need to Know
Before you begin trimming, understanding nail anatomy is crucial for safe cutting.
The Parts of a Puppy's Nail:
- The quick: The living part of the nail containing blood vessels and nerves
- The shell: The hard outer covering of the nail
- The tip: The pointed end of the nail that naturally wears down with use
The quick is the part you must avoid cutting, as it will bleed and cause pain if nicked. In puppies with light-colored nails, the quick appears as a pink area. In dark nails, it's more challenging to see, requiring extra caution.
Understanding Nail Growth:
As nails grow longer, the quick grows with them. Regular trimming encourages the quick to recede, allowing you to maintain shorter nails over time. Conversely, neglecting nail trimming causes the quick to extend, making future trims more difficult.
Essential Tools for Nail Trimming
Having the right tools makes nail trimming safer and more efficient. Consider these options:
Types of Nail Trimmers:
- Guillotine-style clippers: These have a hole where you insert the nail, and a blade that cuts when you squeeze the handles. Good for small to medium puppies.
- Scissor-style clippers: These work like scissors and provide more control. Available in various sizes for different breeds.
- Grinding tools: Electric grinders that file the nail down rather than cut it. These reduce the risk of cutting the quick but may frighten some puppies with their noise and vibration.
Additional Supplies:
- Styptic powder: An essential safety item that stops bleeding if you accidentally cut the quick
- Treats: To reward your puppy and create positive associations
- Good lighting: Helps you see what you're doing, especially with dark nails
- Towel or mat: Creates a comfortable, non-slip surface for your puppy
For beginners, scissor-style clippers are often recommended as they provide good visibility and control.
Preparing for a Successful Trim
Setting the stage properly before you start trimming can make a tremendous difference in how your puppy responds.
Creating a Positive Environment:
- Choose a calm, quiet location with good lighting
- Make sure your puppy is relaxed – after playtime but not when overtired
- Have treats ready to reward cooperation
- Ensure your tools are easily accessible but secure from curious puppies
- Position yourselves comfortably so you can maintain control without straining
Acclimating Your Puppy to Nail Care:
Before attempting a full trim, spend time getting your puppy comfortable with having their paws handled:
- Start by gently touching and holding their paws for a few seconds during cuddle time
- Gradually increase the time you hold their paws, offering treats and praise
- Introduce the clippers or grinder without using them, letting your puppy sniff and become familiar with them
- Practice the motions of trimming without actually cutting
- Make these sessions short and positive, ending before your puppy becomes anxious
This acclimation process may take days or weeks, depending on your puppy's temperament. Patience here pays dividends later.
Step-by-Step Nail Trimming Technique
When your puppy is comfortable with paw handling and you're ready to trim, follow these steps:
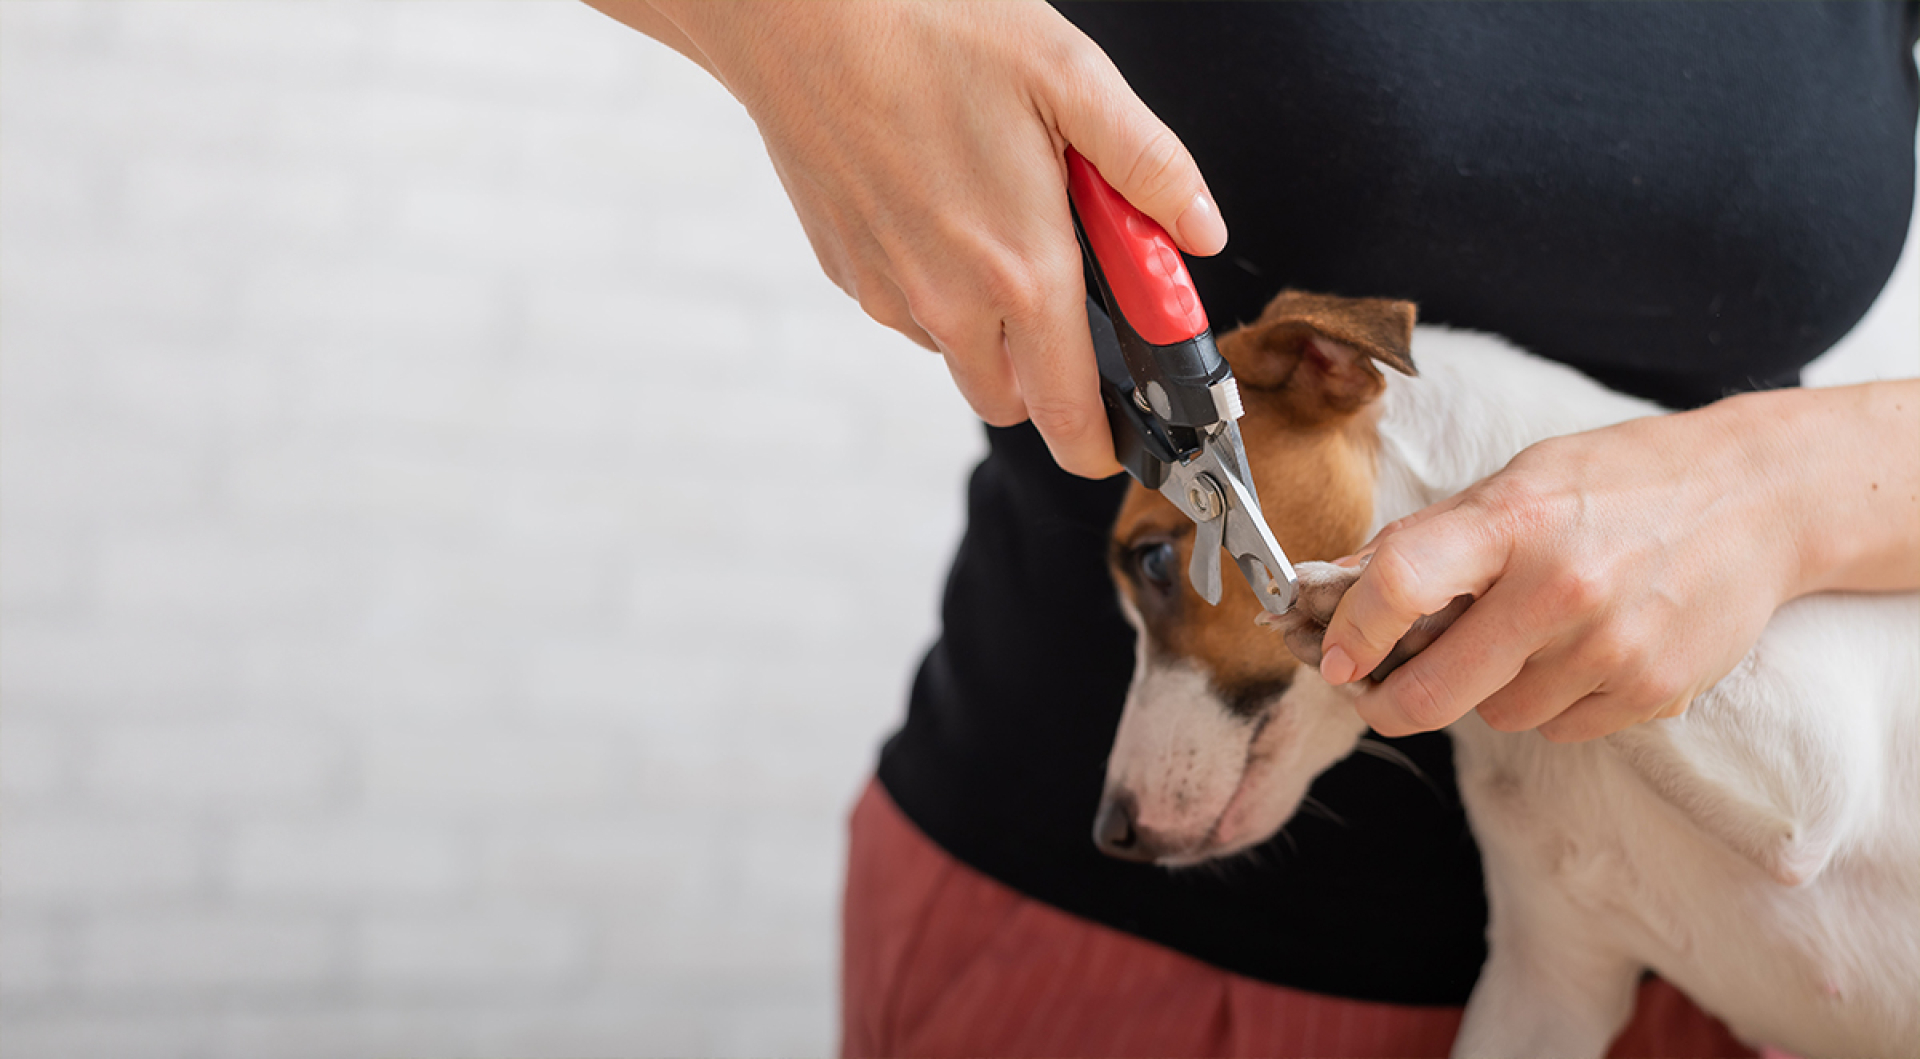
For Light-Colored Nails:
- Hold your puppy's paw firmly but gently, separating the toe you're working on
- Identify the quick (the pink area visible through the nail)
- Position the clippers about 2mm away from the quick at a 45-degree angle
- Make a quick, clean cut through the nail
- Check the cut surface – if you see a small dark dot in the center, you're getting close to the quick
- File any rough edges if necessary
- Reward your puppy with praise and a treat
- Move to the next nail and repeat
For Dark Nails (Where the Quick Isn't Visible):
- Hold the paw securely and comfortably
- Look at the underside of the nail – the quick usually stops where the nail begins to curve
- Make small cuts (1-2mm) at a time
- Check the cut surface after each trim – when you see a small dark circle appear, stop trimming that nail
- Continue trimming in small increments until you see the beginning of a grayish-pink oval on the cut surface
- Reward frequently throughout the process
Using a Grinder:
- Turn the grinder on nearby first so your puppy can get used to the noise
- Hold your puppy's paw firmly to prevent movement
- Touch the grinder to the nail briefly (1-2 seconds) at first
- Gradually increase contact time as your puppy accepts the sensation
- Grind a small amount at a time, checking frequently
- Work from the bottom of the nail upward in a sweeping motion
- Be careful of fur that might get caught in the grinder
- Reward generously throughout the process
Dealing with Dew Claws
Dew claws are the "thumb" nails located on the inner side of the legs. Not all dogs have them, and some may have them only on the front legs.
Special Considerations for Dew Claws:
- Dew claws don't touch the ground, so they never wear down naturally
- They can grow in a curve and eventually embed into the paw pad if neglected
- They require regular checking and trimming
- They may need more frequent attention than other nails
- Be extra gentle as these nails can be more sensitive
Follow the same trimming technique as for other nails, being mindful that dew claws may be less familiar with handling.
What to Do If You Cut the Quick
Despite the best precautions, accidents can happen. If you cut into the quick and the nail begins to bleed:
- Stay calm – your puppy will respond to your emotions
- Apply styptic powder immediately to the bleeding nail
- Apply gentle pressure for 30 seconds
- Reassure your puppy with a soothing voice
- End the trimming session for the day
- Monitor the paw for any signs of infection in the following days
If bleeding doesn't stop after applying styptic powder, or if your puppy seems to be in significant pain, contact your veterinarian.
Common Challenges and Solutions
Even with preparation, you may encounter some challenges when trimming your puppy's nails.
Handling a Wiggly Puppy:
- Try trimming when your puppy is tired after exercise
- Use a second person to help hold and distract with treats
- Consider using a grooming hammock or sling for very wiggly puppies
- Break the process into shorter sessions, doing just a few nails at a time
- Try different positions until you find one that works best
Dealing with Anxiety or Fear:
- Go back to the acclimation process and proceed more slowly
- Use high-value treats reserved specifically for nail trimming
- Try trimming during relaxing activities like watching TV
- Consider using calming aids like a thunder shirt or pheromone products
- For some puppies, having a "nail trimming buddy" (another calm dog) present can help
Working with Very Thick Nails:
- Ensure your clippers are sharp and appropriately sized
- Consider using a grinder for thick nails
- Soak the paws in warm water for 5 minutes before trimming to soften nails
- Trim more frequently in smaller amounts
As your dog ages, nail trimming remains an important part of health care. For more tips on aging dogs, check out our blog post on how to help your dog age gracefully.
Professional Help: When to Seek It
Sometimes, professional assistance is the best option:
- If your puppy shows extreme stress or aggression during nail trimming attempts
- If you're consistently unable to trim the nails safely
- If your puppy's nails have been neglected and are severely overgrown
- If you'd like a demonstration of proper technique before trying yourself
Veterinarians, professional groomers, and some pet supply stores offer nail trimming services and can provide guidance for home care.
Developing a Routine
Consistency is key to successful nail maintenance:
- Set a regular schedule for nail checks and trims
- Create a positive ritual around nail care time
- Maintain your tools properly, keeping clippers clean and sharp
- Track which nails you've trimmed if you're doing a few at a time
- Gradually decrease the time between trims to encourage the quick to recede
Many successful puppy parents pair nail trimming with another regular activity, such as a weekly bath or grooming session, to help establish a routine.
FAQs About Puppy Nail Trimming
How young can I start trimming my puppy's nails?
You can begin handling your puppy's paws from the day they come home, and start actual trimming as early as 6-8 weeks. Early introduction helps puppies accept nail care as a normal part of life.
My puppy has black nails. How can I avoid cutting the quick?
With dark nails, trim very small amounts at a time. After each cut, look at the cut surface—when you see a small dark circle in the center, stop trimming that nail as you're approaching the quick.
How can I tell if my puppy's nails are too long?
If you hear clicking when your puppy walks on hard surfaces, if the nails extend beyond the paw pad when standing, or if the nails are beginning to curve, they're too long.
What if my puppy absolutely refuses to let me trim their nails?
Don't force the issue, as this can create long-term anxiety. Instead, go back to basics with paw handling and desensitization, or consult a professional trainer or veterinarian for assistance.
Can I file my puppy's nails instead of cutting them?
Yes, manual filing is an option, though it takes longer. Some puppies prefer the gradual sensation of filing to the quick pressure of clippers. This can be a good alternative for puppies sensitive to clipping.
Conclusion
Nail trimming is an essential part of puppy care that contributes significantly to your pet's health and comfort. By understanding proper technique, preparing adequately, and approaching the process with patience, you can make nail trimming a positive experience for both you and your puppy.
Remember that consistency is key—regular, positive nail trimming sessions will help your puppy become comfortable with the process and prevent the problems associated with overgrown nails. While it may take time to establish this routine, the investment pays off in your puppy's long-term well-being.
At Healthy Pups, we believe in providing you with the knowledge and skills to care for your puppy in every aspect of their health. For more information about puppy care or to discuss any concerns about your puppy's grooming needs, contact us today. Our experienced team is here to support you throughout your puppy parenting journey.